Tutorial
A Beginner's guide to using VRAY for Rhino
"Discover the Power of VRay: A Comprehensive Guide for VRay for Rhino Beginners"
If you are a Rhino user, VRay for Rhino is one of the best options available to elevate your visualization game, whether for quick presentations or award-winning images. This guide covers all the main elements composing the VRay for Rhino Plugin to help you understand the different parts that compose this powerful tool and get you started.
Overview of VRay for Rhino
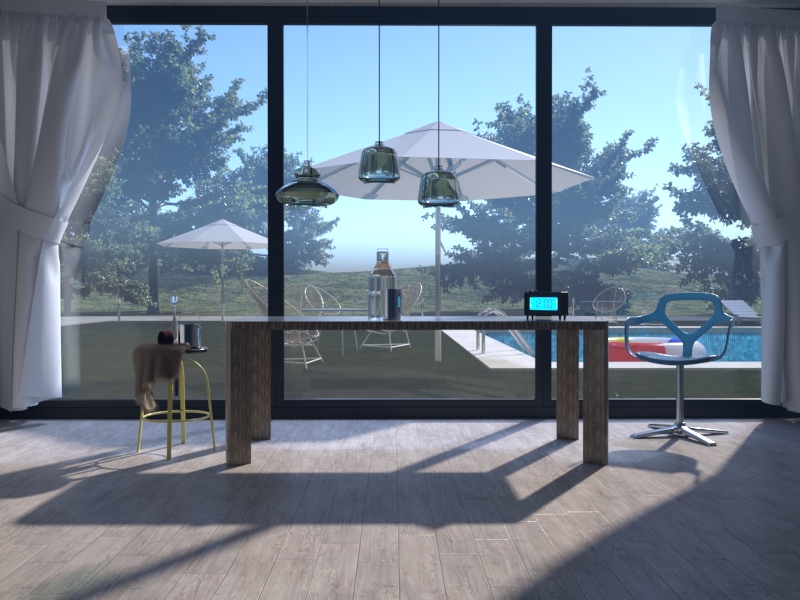
VRay is a plug-in for Rhino, a popular 3D modeling software used in architecture, industrial design, and product design. VRay in Rhino allows you to create highly detailed and photorealistic images, animations, and virtual reality experiences from your Rhino models.
Benefits of using VRay for Rhino
By incorporating VRay into your workflow, you can improve the quality and speed of your renders, save time by automating repetitive tasks, and have more control over lighting, materials, and camera settings. With VRay, you'll be able to create stunning images that accurately depict your designs, making it easier to communicate your vision to clients, stakeholders, and collaborators.
The best part being doing all this within a platform you are already familiar like Rhino 3d, without have to switch back and forth from other interfaces.
Getting Started
Installing VRay
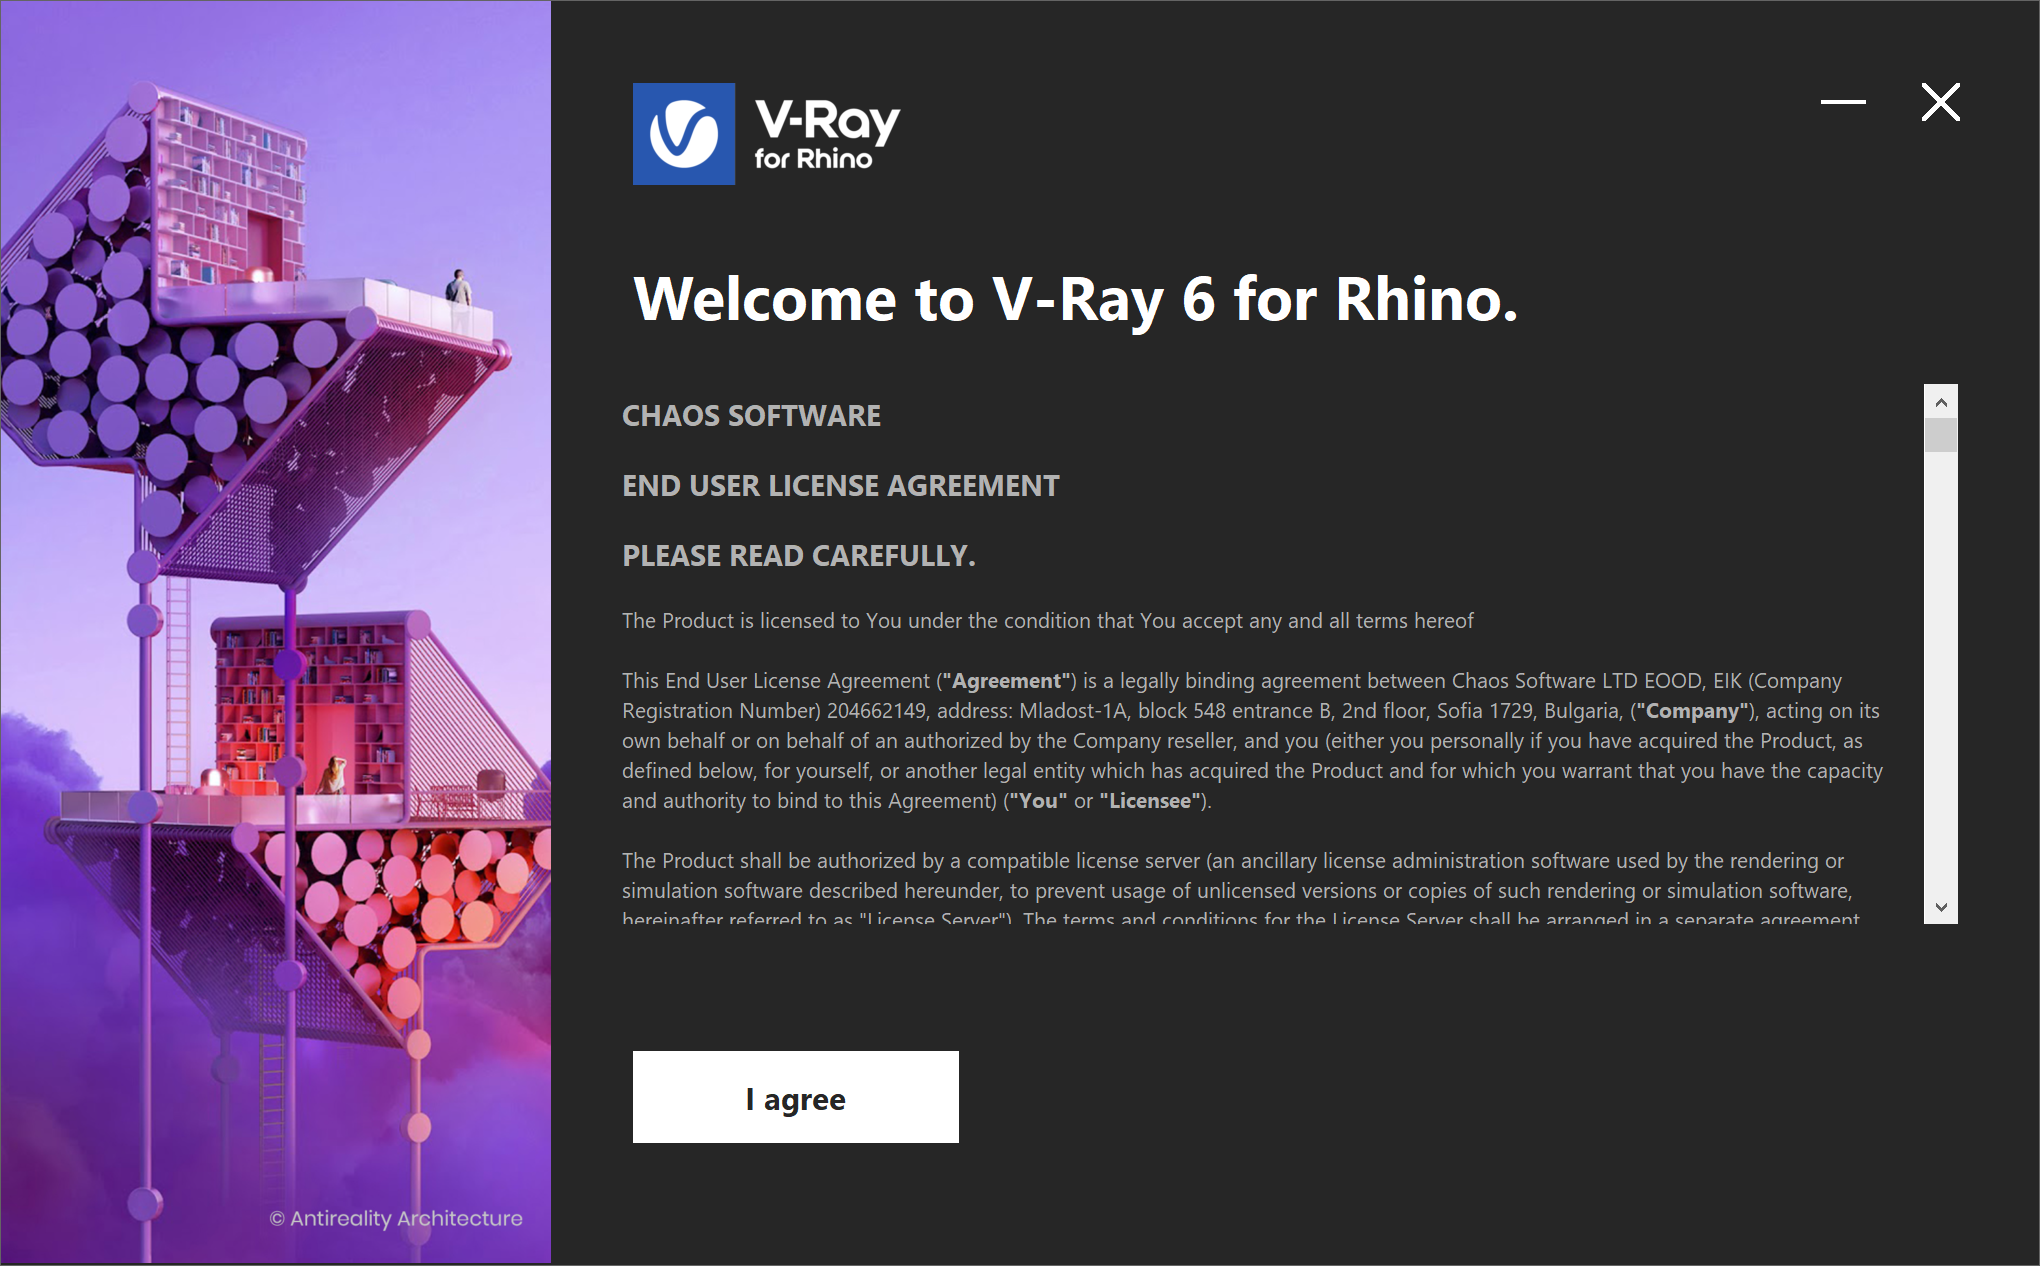
Before you can start using VRay in Rhino, you'll need to install the software. If you already have a license for VRay, follow the installation instructions provided by the software's developer, Chaos Group. If you don't have a license, you can purchase one from their website or a reseller.
To start the installation, download and double-click the installation file.
You will be presented with the license agreement. After you read it, click I Agree to continue.
 Afterward, you can select the version of Rhino you are using to install V-Ray. The installer for Rhinoceros will automatically add the V-Ray toolbar in Rhino and components in Grasshopper.
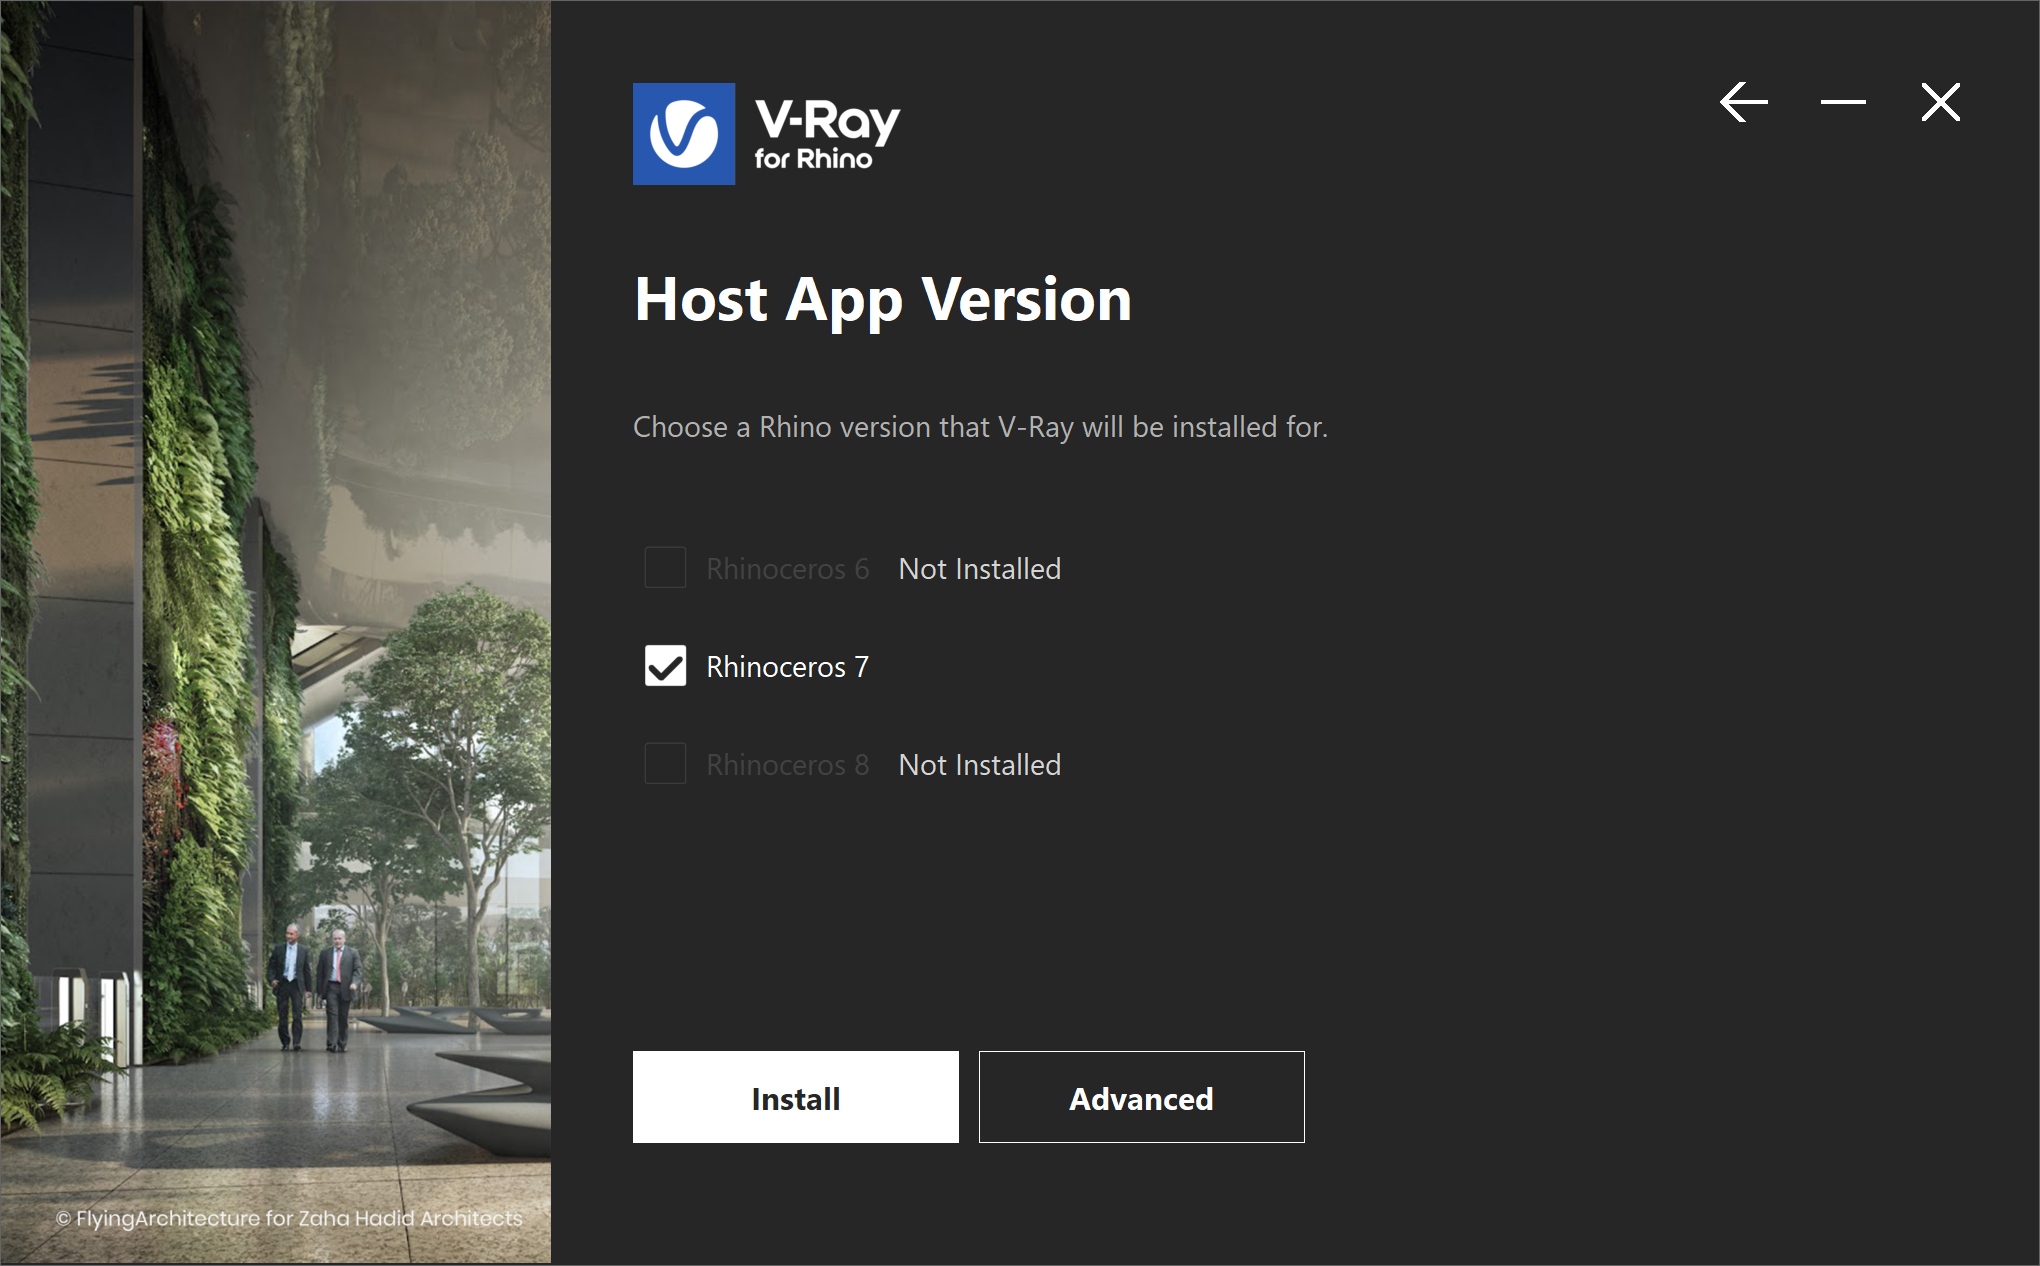
Click the Install button to proceed with standard installation.
Setting up VRay for Rhino
Once VRay is installed, you'll want to ensure it is set up in Rhino. If it wasn't automatically added, the process is straightforward and can be done in a few steps.
To start, open Rhino, go to the Plug-ins menu and select VRay. This will activate VRay and open the VRay Toolbar, which you'll use to access all of VRay's features.
To access the Toolbar, you must set your current renderer to VRay (Render menu > Current Renderer > V-Ray for Rhino).

Basic Interface Overview
The VRay interface is intuitive and easy to navigate. One of the main windows is the Asset Editor,on the left side of the interface, you'll find a list of tabs, each of which corresponds to a different aspect of VRay's functionality, such as materials, lighting, or camera settings. On the right side of the interface, you'll see a series of options and controls for the selected tab. To get started, take a few minutes to familiarize yourself with the VRay interface and its different sections.
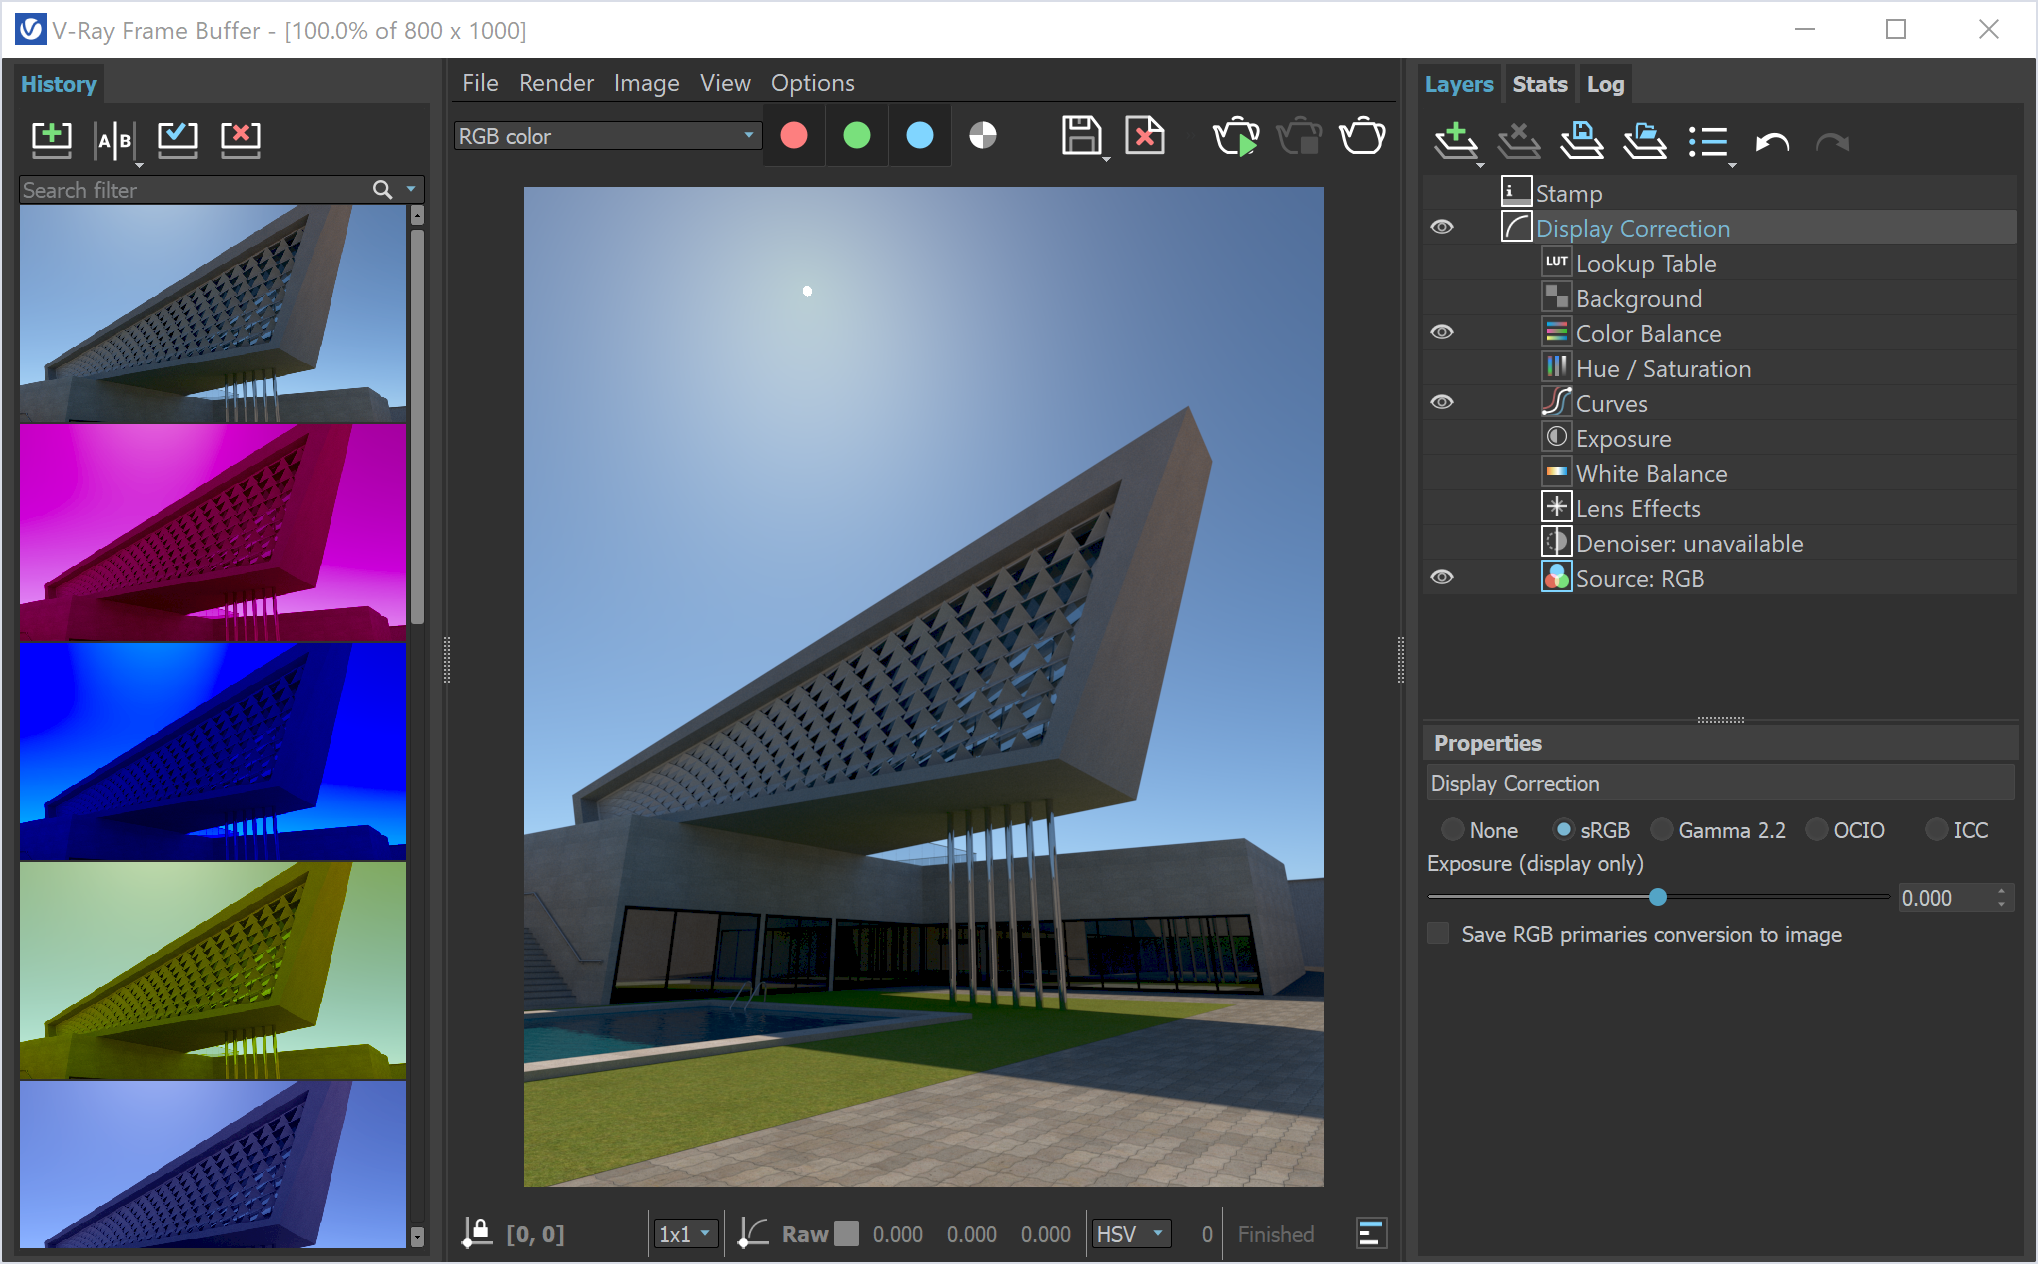
Another Important interface to start getting familiar is the VRay Frame Buffer (VFB) that provides a visual representation of the final rendered image. It allows users to view, adjust, and save the rendered result in various image formats. The VFB also provides multiple tools for color correction, exposure control, and post-production, making it an essential component of the VRay workflow.
Understanding VRay Render Settings in Rhino
Render Elements
Before you begin rendering your scene, it's essential to understand what render elements are and how they work. Render elements are components that make up a VRay render, such as the diffuse, reflection, and refraction channels. By separating the render into these elements, you have more control over the final image and can make changes to individual elements in post-production if necessary. Render elements are also sometimes known as render passes.

Common Render Settings Options
Once you better understand the different types of render elements, you can start exploring VRay's different render settings options. These options include the size of the final render, the quality of the shadows, the quality of the reflections, and the quality of the refractions. Each of these settings has a trade-off between render time and quality, so it's essential to understand how they work and affect the final render.

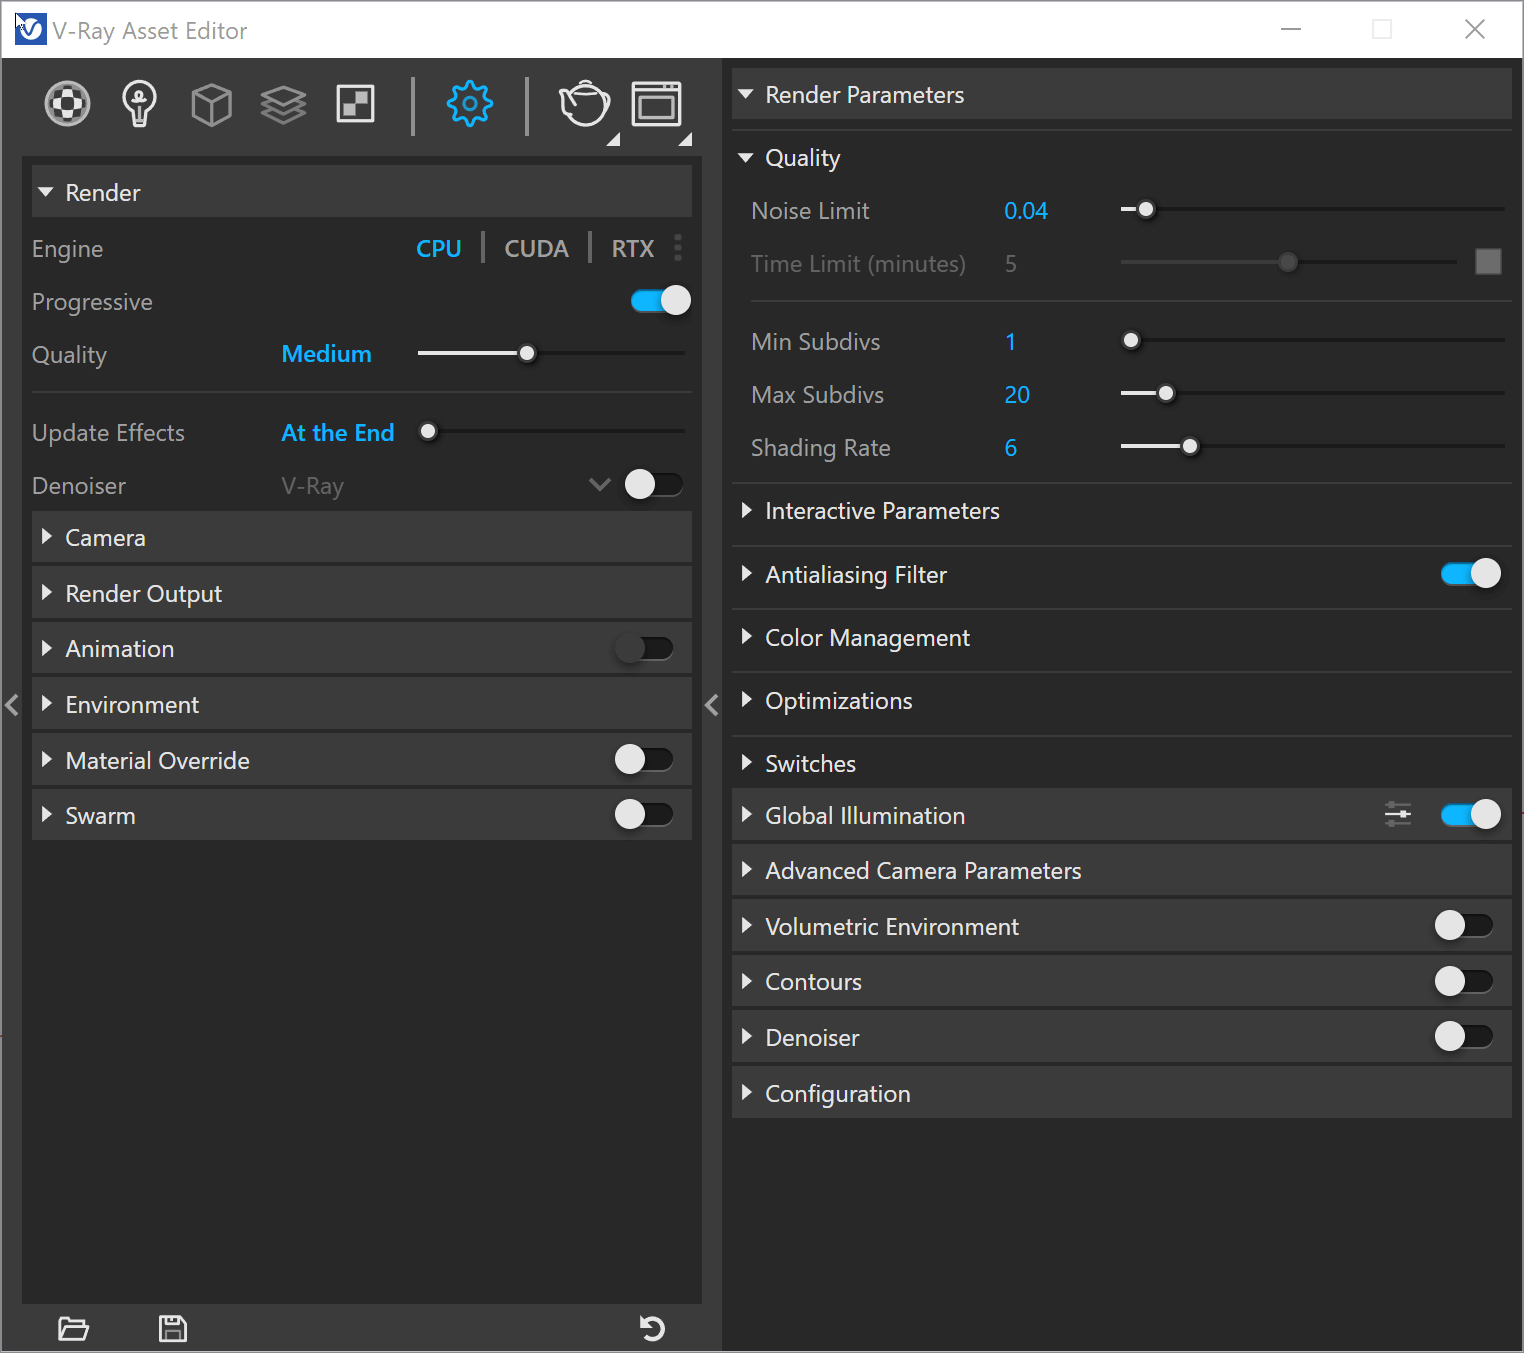
The V-Ray Settings control the parameters that affect the rendering process and can be found in the Asset Editor under the Settings tab. The default options for scene setup can be found in the main panel and are suitable for most scenes.
Below are some of the main settings:
- Render: These settings provide convenient access to standard Rendering functions, such as choosing the render devices or turning VRay Interactive and Progressive modes on and off. You are also able to select from several Quality presets as well.
- Camera: Used to control the view and perspective of our rendered scene. They allow you to define the virtual camera's position, orientation, focal length, and various other aspects, such as lens distortion, depth of field, and exposure.
- Render Output: These settings determine the final format, size, and resolution of the rendered image or animation. They also control various output aspects, such as the file format, color depth, and compression method.
- Animation: You can control animated sequences in Rhino. They provide options for defining the animation's length, output format, and frame rate.
- Environment: These control the lighting and background of a scene, including options for setting up the background color, environment maps, and light sources such as HDRI and physical sun and sky systems. The settings also allow for customizing the environmental effect on reflections and global illumination in the scene.
Customizing Render Settings for Specific Projects
As you work on different projects, you'll find that specific render settings work better for certain scenes. For example, you could use a higher quality setting for an architectural interior, where fine details are important, but a lower quality setting for a quick concept rendering. By customizing your render settings for each project, you can ensure that your renders are optimized for the specific needs of each project, saving you time and improving the quality of your work.
Lighting Techniques in VRay for Rhino
Different Types of Lights
VRay offers a wide range of lighting options, including photometric lights, environment lights, and light sources like sunlight and skylight. Understanding the different types of lights and how they work is crucial to creating realistic lighting in VRay.
You can find the appropriate lighting options in the V-Ray toolbar or the Asset Editor.
Depending on the scene and the effect you are trying to create, you might choose to use only one type of light or any combination of lights.
Below you can find some of the different lights you can use:
-
Omni Light: The Omni Light in VRay 6 is a type of point light source that radiates light in all directions from a single point. It's a versatile light source that can be used for various lighting scenarios, such as a bright light in the center of a room, a street light, or a light bulb.It can be adjusted for intensity, color, and falloff distance, and it can also be set to cast shadows.
-
Rectangle Light: A type of light emulates an area light, meaning it has a rectangular shape and emits light in all directions. It helps create soft shadows and simulate light sources such as window panels or fluorescent lights.
-
Spot Light: A type of light source that simulates a directional light from a single point and projects light in a cone shape. It is commonly used for creating directional lighting effects, such as spotlighting objects or illuminating a specific area. The cone's shape, size, and intensity can be adjusted to fine-tune the lighting for the scene.
-
Dome Light: This type of environment light creates a hemispherical light source. They can be used to simulate natural or artificial light from the sky, providing soft, even illumination for a scene. You can customize the Dome Light to change its appearance, intensity, and color to create a range of lighting conditions and moods.
-
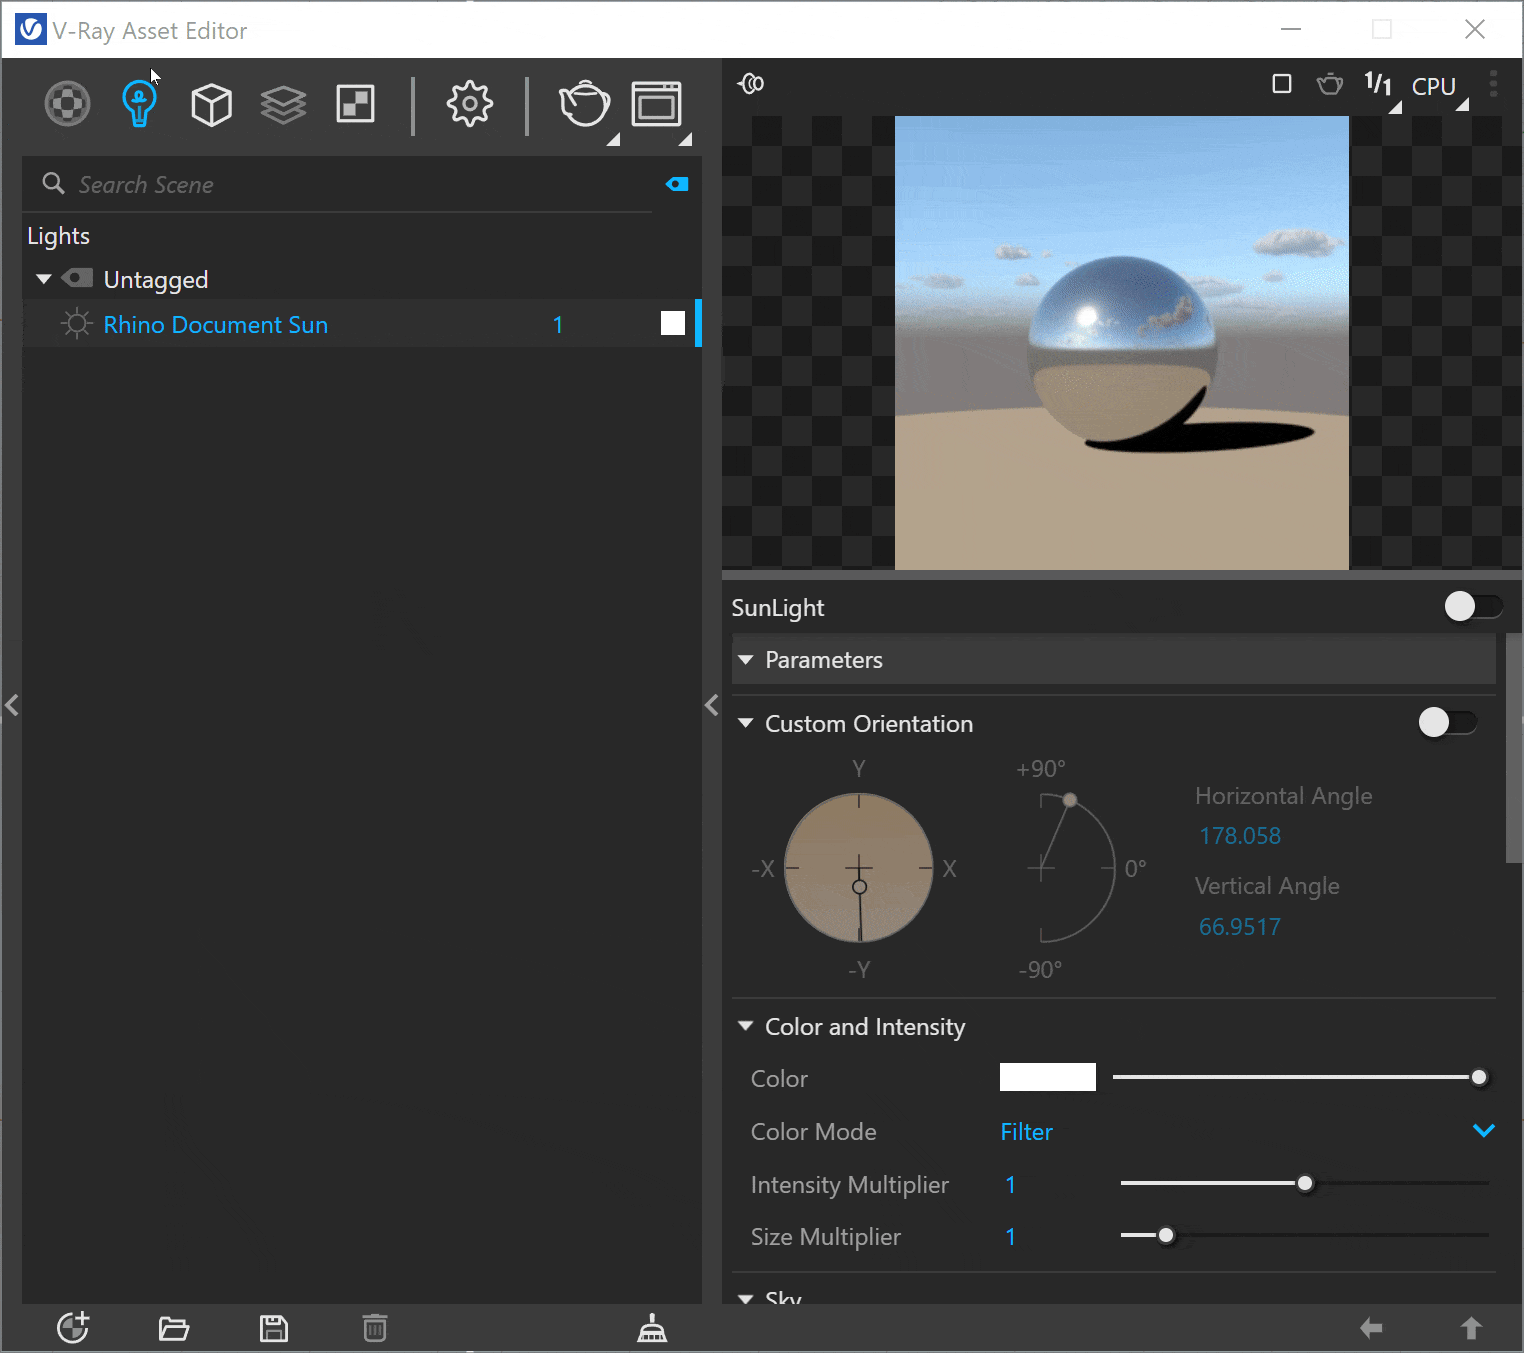
SunLight is a specialized light source that creates a directional light that simulates the sun. This light is helpful for outdoor scenes and can be adjusted based on the time of day and latitude/longitude position. The SunLight also provides options for controlling the appearance of the sky and atmospheric effects such as volumetric scattering.
Things to consider for Lighting in VRay
To get the most out of VRay's lighting capabilities, there are a few best practices to keep in mind. These include starting with a basic three-point lighting setup, combining different light types to achieve the desired look, and adjusting the brightness and color of lights to achieve the right balance. Additionally, it's essential to understand how to use VRay's light properties, such as shadow softness and light falloff, to control the look of the lighting in your scene.
Tips for Creating Realistic Lighting in VRay
There are a few tips to keep in mind to create the most realistic lighting possible in VRay. For example, consider using HDRI maps to light your scene, paying close attention to the direction and intensity of your lights, and adjusting the environment settings to create the right balance between ambient light and direct light.
Additionally, you can use light linking to control which objects are affected by each light source, giving you even greater control over the final look of your scene. By following these tips and experimenting with different lighting setups, you'll be able to create stunning and photorealistic lighting in VRay for Rhino.
Creating Textures and Materials in VRay for Rhino
Overview of VRay Material Editor
The VRay Material Editor is where you create and modify the materials in your scene. This powerful tool allows you to control the appearance of your objects by adjusting properties like color, reflectivity, and transparency. You can also add textures, such as bump maps and displacement maps, to add depth and detail to your materials.

You can also access the Material creation via the Layer and Object material properties.

Creating Custom Materials
With VRay, you can create your own custom materials from scratch, giving you complete control over the appearance of your objects. The Material Editor provides a wide range of options for customizing your materials, including the ability to adjust the properties of each layer, add textures, and fine-tune the look of your materials.

Using Materials from VRay's Presets Library
In addition to creating your own custom materials, VRay also provides a library of pre-made materials you can use in your scenes. These materials can be imported into the Material Editor and easily applied to your objects, saving you time and allowing you to achieve a more professional look easily. Whether you're looking to quickly add a realistic metal or a unique, custom material, VRay's Preset Library has a ton of materials to cover your needs.
Render Optimization in VRay for Rhino
Common Optimization Techniques
Optimizing your VRay renders can significantly reduce render times and improve the final quality of your images. Some standard optimization techniques include reducing the number of lights and objects in your scene, using lower-resolution textures, and reducing the number of render elements. Additionally, you can use proxy objects to simplify complex things and adjust the settings for the VRay sampler to balance render quality with render time.
Using VRay Denoiser for Faster Renders
VRay's Denoiser is a powerful tool that can significantly reduce render time while maintaining image quality. This feature uses machine learning algorithms to remove noise from your renders, allowing you to produce high-quality images with much faster render times. To use the VRay Denoiser, simply enable it in your render settings, and VRay will automatically remove noise from your images, resulting in faster and higher-quality renders.
Troubleshooting Common Render Issues
Despite the many advantages of using VRay, some common issues can still arise during the render process. Some common issues include noisy renders, incorrect lighting, and missing objects. To troubleshoot these issues, try adjusting the render settings, checking the lighting in your scene, and verifying that all objects are correctly assigned materials. Additionally, you can consult VRay's online help resources or reach out to the VRay community for assistance.
By understanding these common issues and learning how to resolve them, you'll be able to produce stunning and high-quality renders with VRay for Rhino.
Conclusion
Summary of Key Points
In this beginner's guide, we've covered all the main elements to look for in VRay for Rhino, including installing and setting up VRay, understanding render settings, lighting techniques, creating textures and materials, and rendering optimization. We've also discussed common issues and troubleshooting techniques for ensuring a smooth render process.
Continue Learning and Exploring
We hope this guide can serve you as a reference as you start your journey into learning how to create amazing renders with VRay, we'd like to recommend you to visit our course library that contains courses in architectural visualization that cover this topics in more depth, specially our VRay Fundamentals course with Brandon Gibbs.
Posted by

Rodrigo Medina
Senior Advocate